Sunday, January 31, 2010

Carol Marine painting demonstration


Daily painter Carol Marine creates a small still life painting, of a bell pepper, in the instruction video Carol Marine Daily Painting Demo. She paints on a canvas with a yellow underpainting, and begins by making marks indicating the outer edges of the pepper and its shadow. Next, she draws in the shapes of her composition. Nice use of the negative space, isn't it?

Once her composition is laid out, she begins blocking in the big shapes of her painting, both in the positive and negative space.

She paints quickly (she's had a lot of practice). Notice how she uses her brush strokes in the negative space to help define the positive shapes?

Notice how she moves from larger shapes to smaller ones as she develops the painting? The lovely details of highlights and small shadows on the pepper and its stem work well, because the structure of the composition underneath it works.

You can see more of her artwork online at bluecloudstudios.com, and you can read her blog at carolmarine.blogspot.com.

Saturday, January 30, 2010

Karl Blossfeldt's use of positive and negative space


Karl Blossfeldt, Silphium laciniatum, Compass-plant, leaf dried on stem (magnified 5 times)

Karl Blossfeldt was in his sixties when his botanical photographs were first published, in Urformen der Kunst (Art Forms in Nature), in 1928. His work was both popular and influential, being republished internationally in a number of editions, and influencing both architects and decorative artists of his time. You can see many of his images on one page here.

Karl Blossfeldt, Adiantum pedatum, American maidenhair fern (magnified 8 times)

He worked as a photographer in late-nineteenth century Berlin, where he taught design at the School of Decorative Arts. His photographs are all close-ups of plant forms and features – but the negative spaces make them work.

Karl Blossfeldt, Cucurbita, Tendrils of the pumpkin (magnified 4 times)

Thank you to Brigitta Wiederhold for introducing me to Blossfeldt's work!

Monday, January 25, 2010

Negative space - it's not just background


The phrase "negative space" doesn't mean what you might think. If you're painting an apple, and someone talks about the apple's negative space, it does not actually mean that the apple's emotional state is dire. In art, negative space refers to the space around the apple.

People, animals, objects – all occupy space. We have form, shape, and weight. When you put images of us into two dimensions, we are positive space. So the apple is positive space – or a positive shape. The space around it is negative space (or negative shape).

Another word for positive space is "figure." The apple, in a painting of it, is the figure.

The negative space – the space around the apple – is also called the ground. If it's the ground in front, it's the foreground; if it's the ground in back, it's the background. Makes sense, right?

But the word background implies it's not important. It also implies that you paint it first, and then slap that apple right on top of it. If you do that, you'll have a painting of an apple slapped on top of a background. Bor-ing....

The thing to remember is that the positive and negative space are equally important in making the composition work. The negative shapes need to be interesting – not an afterthought. It's kind of like music – the notes wouldn't work without the silences between them.

Sunday, January 24, 2010

Jerry Fresia's Painting Class Video


Painter Jerry Fresia, who moved from the San Francisco Bay Area to a wonderful castle on Italy's Lake Como, demonstrates his painting process in the YouTube video A Painting Class on Lake Como, Italy. It's a great time-lapse glimpse of how a painting is constructed.

He begins by sketching his composition in charcoal on the canvas, then rubs it out, and paints in the basic composition. Notice how the composition is clearly indicated, but that he does not need to draw specific detail. This stage is all about making a beautiful structure upon which everything else will depend.

He follows with an underpainting (he is painting in oils). Notice the gorgeous colors he is mixing, and the subtlety of shadowed areas that will influence what comes on top of it.

After painting some of the lines in again, he comes back in with color, and brings the painting to completion. This is the point at which he gets more specific about colors and smaller details – not before. As you watch the video, notice his brushwork, too, and how each brushstroke is created by the movement of his whole arm.

Be sure to listen to his explanation of his painting process as you watch the video – he teaches clearly and well.

You can find all of Jerry Fresia's videos by going to www.YouTube.com and typing in his user name, FresiaStudios. He teaches workshops at his beautiful studio – and you can learn more about his paintings, his studio, and his workshops at www.fresia.com.

Monday, January 18, 2010

Making Brush Strokes, with David Leffel


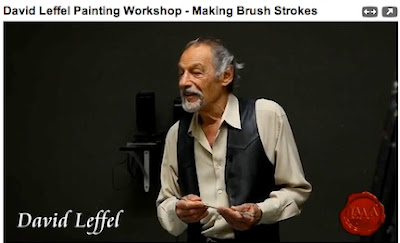
Perhaps the most important thing for a painter is to learn how to use the brush – which is different from using a pen or pencil. One of the best introductions I've ever seen to learning how to use the brush, and to make brush strokes, is that given by David Leffel in this video, "David Leffel Painting Workshop - Making Brush Strokes," on YouTube, from a DVD painting workshop set from the Los Angeles Academy of Figurative Art.

Notice that he uses the brush's long handle, holding it further out, and holding it differently than he would a pen or pencil. He describes how you use the brush as akin to how you see - that if you want to see the way an artist does, you need to learn to use the brush as an artist does.

It's a wonderful explanation. If you'd like to watch a little more of David Leffel, David A. Leffel Art Instruction Video - Painting the Portrait: Portrait of Lewis is a good place to continue. He continues talking about brush strokes, as applied to the painting of a portrait, and shows how he begins a painting. As he says, "In order to understand how to finish a painting, one must know how to begin a painting." Beginning a painting determines everything.

Monday, January 11, 2010

New Acrylic Painting classes begin January 20 & 22

Spring classes at the Calistoga Art Center begin the third week of January!

Acrylic Painting classes will run on Wednesdays from 1:00 to 4:00 p.m., beginning on January 20th, or on Fridays from 1:00 to 4:00 p.m., beginning on January 22nd. Napa Valley College is maintaining its commitment to keep these classes free for adults, as long as we have a minimum of fourteen students on the first day.

So, here's the skinny - in addition to all the things I cover for students who are new to painting - the basics of composition and design, how to begin a painting, mixing colors, the painting process, you name it - and helping students individually as they progress with their paintings, students last semester asked for an extra focus on brushwork, color, and portraits. (That doesn't mean that everyone has to paint portraits. You can tuck away the information for future reference, if you're not interested in painting portraits now.)

Materials for the first day:

Acrylic brushes (if you are about to buy new brushes, buy filberts)
in a range of sizes (you can begin with two or three brushes)

Water container (preferably plastic), paper towels, masking tape


Palette


Paint: Titanium white


Acrylic painting paper or canvas paper (preferable),

or watercolor paper, at LEAST 9"x12" (larger is great!)


"The Masters" brush cleaner


Materials for the rest of the semester:

Paints (whatever you have, and whatever colors you choose
after the first day)

Acrylic painting paper, canvas paper, canvas boards,

gessoed masonite, or canvases as your painting surfaces - your choice


Any questions? You can contact me through the Art Center at (707) 942-2278.

The classes are held in the Art Center's new space in Calistoga's historic Masonic Building, on the second floor, at 1336 Lincoln Avenue, Calistoga.